Sunday, December 03, 2006


Non-traditional materials:

here's some "playing" with bitumen, varnish, shellac, ink, oil-based paint, salt.... whatever I could get my hands on basically!

and some wax (top) and silicone (bottom) :

the silicone was a bit gunky - I wanted to drop it onto each stitch but couldn't do that - maybe I need to source a more liquid silicone (we used the stuff for sealing baths/sinks with).

The wax was easier to work with in some ways (less smelly, certainly!) and being liquid could be moved across each stitch more easily when using a tjanting (the "pen" with wax reservoir used for batik).

Lastly, resin - these pieces were not completely immersed, at the top the back of the knitting was immersed in resin, leaving the fur stitch loops free, and the piece on the bottom had the loops immersed int he resin, leaving the main knitted piece free.

It's interesting how the resin soaked into the yarn (undyed Colinette Point5) and removed it's opacity - this is definitely somthing I need to play around with again.

I'll photograph my sketchbook next time & show the images I'm going to work with further for the artists book I need to do. It's based on photo's I took at the beach last year, but cropped & moved around a bit so that they aren't obviously images of a shoreline anymore. The shapes and colours are really interesting though & I can see how I can use them as layers of different knitted pieces treated differently to create the pages of my book.

Sunday, November 26, 2006

It's been a l-o-n-g time since I last posted & I've knitted a number of things since & acquired more stash!

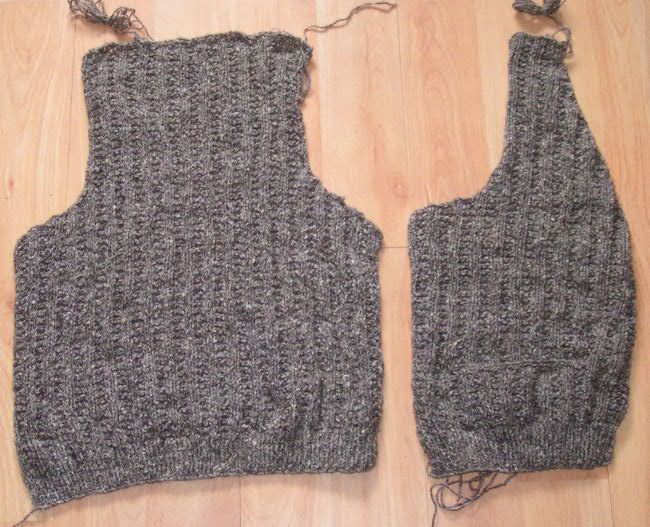
So, firstly, the waistcoat was finished sometime ago:

the buttons are made from occonut shell & are chunkier than I would have normally used, but I had to bear in mind that the garment is for a person with arithitic fingers.

I did knit & then sew on all the bands individually, my head just couldn't be bothered to work out the technicalities of picking up stitches & working out how to get a vertical rib effect happening the other way. So, I was true to the pattern & the sewing wasn't as awful as expected!

It looks a bit lumpy in the photo, but I think it'll ease itself flatter with wear - the pieces were all blasted with steam before sewing up & the finished article blasted again with steam, but it's a pretty heavy yarn & mistake ribbing isn't as flat as a standard 2x2 rib anyway. So that's my excuse!!!

Stash enhancements:
I went to Ally Pally for the knitting & stitching show for the first time! I was so glad I'd reserved a certain amount of money from previous commissions so that I had some spending money - otherwise the credit card would have been crying!

I could have bought an awful lot more than I did, the blown budget was in the back of mind as was the fact that I had to carry everything on a bus, across tube stations and onto the train at Paddington too!

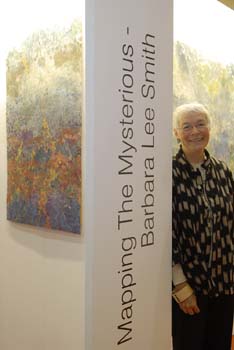
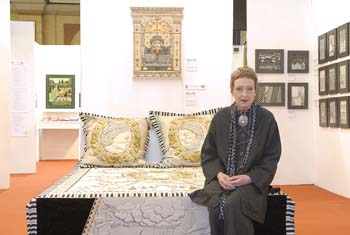
I went with a friend from college, during the show we pretty much did our own thing apart from meeting for coffee, lunch etc. and we went around the exhibitions together - some work exhibited I loved - truly inspiring,


other things I didn't like, just not my thing:


So, what blew the budget????
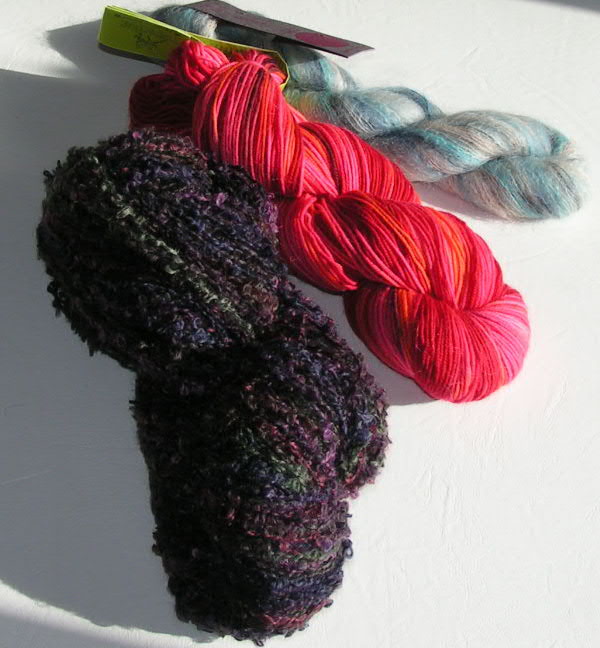
some books and yarn (of course!) : (Apologies for the lighting in some of the photos - I either remember to take photos when it's dark or when it's really sunny!)


From the left, going anti-clockwise:

Touchyarns boucle - I spotted this yarn almost as soon as I'd entered the show & adored it & this colourway - a mix of plums, navy & forest greens. Yummy! I bought enough to do the Pimlico Shrug from Tracey Ullman & Mel Clark's book (another show purchase that made for a great read on the train home).

Colinette's new sock yarn in Fire colourway (yeay! another yarn for me to indulge my Colinette passion in!) unfortunately it's not yet available in my favourite colourway (Dark Umber).

And finally Parisienne from Colinette in Sea Breeze colourway - my second favourite! I bought enough to make a cowl-necked jumper - probably to be knitted at a fairly loose gauge - the sort of see-through but warm sweater that requires a decent camisole beneath.

Of course that wasn't all, I also bought the Knit Cafe book - I loved the whole concept of a cafe & knitting - almost my idea of heaven - just needs a bookshop too! Again that made for lovely reading on the train home. Further stash enhancement was to be found at Habu textiles - a stall covered in baskets that held neat little bundles or long narrow cones of utter delight. Subtle shades and a stand that didn't shout, but one that drew me in deeper & deeper to hold & touch and wonder at the texture and subtleties of the huge variety of yarns there.

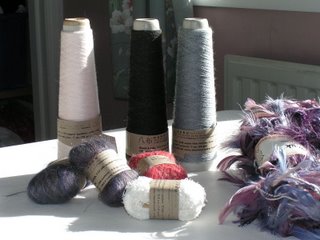
The cones are (L to R):
Bamboo/Copper - a fine copper wire wrapped around a bamboo core - this is almost pink in colour.

Merino/Stainless Steel - black merino wrapped around a fine stainless steel wire

Merino in grey.

In front of the cones are bundles of space-dyed fine mohair, 2 in purples/blues/greens and one in firey oranges and reds.
The white bundle is a paper yarn that resembles a kite tail (the ones I used to draw as a kid with the bows across it!) , which should prove to be quite interesting when knitted up.

The feathery yarn on the right was found on another stand (can't remember which - it was all a little overwhelming!) which I just had to have - it's dyed feathers spun into a silk core - not much on a skein (26m), but it should make an interesting scarf or at least an interesting edging to a scarf.

I managed to get into one of the workshops on the sunday with Ruth Lee - all about using short rows to create texture, a technique I've used a lot in socks & garments, but really nice to be inspired to use it differently and to also be given lots of different paper yarns to try. I also learnt to knit backwards - theoretically faster than turning the work all the time, but I need to get a bit more practise in before it is actually faster!

Tuesday, October 17, 2006

Rust no more! - 'tis done - see the 1st October post for the original object.


Here's some close-ups of various places to show the mark-making & texture created by marks (and a little moulding paste & tissue overlay).


paint, sand, oil pastel, pencil scratched into the oil pastel, soft pastel scratched into other pastel... and so on! 
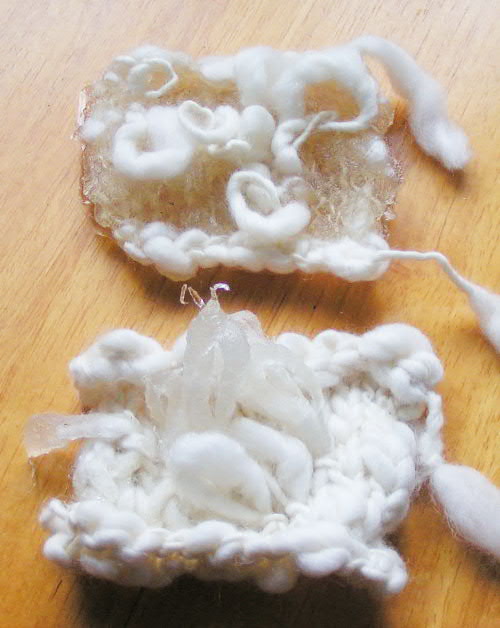
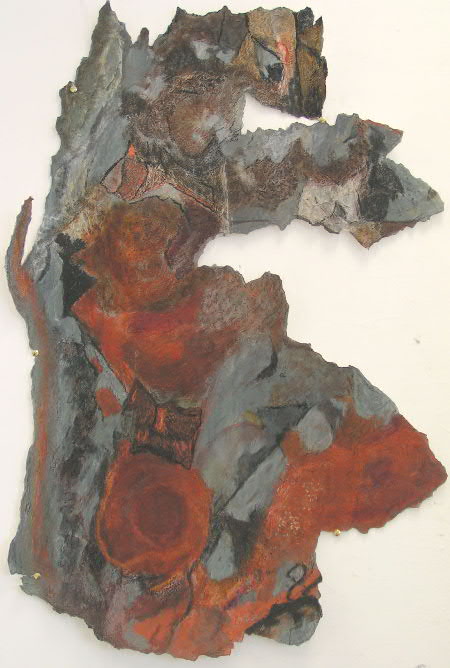
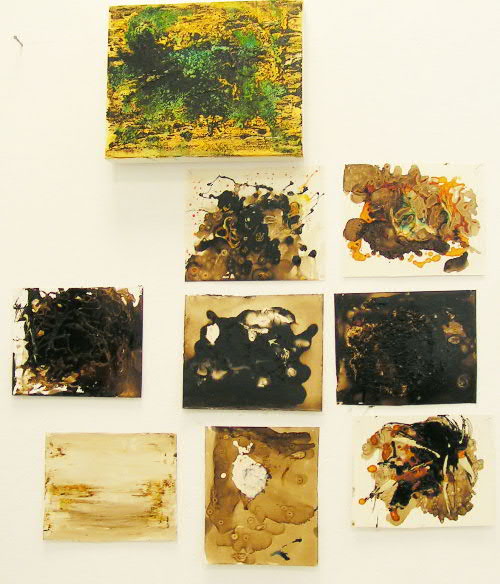
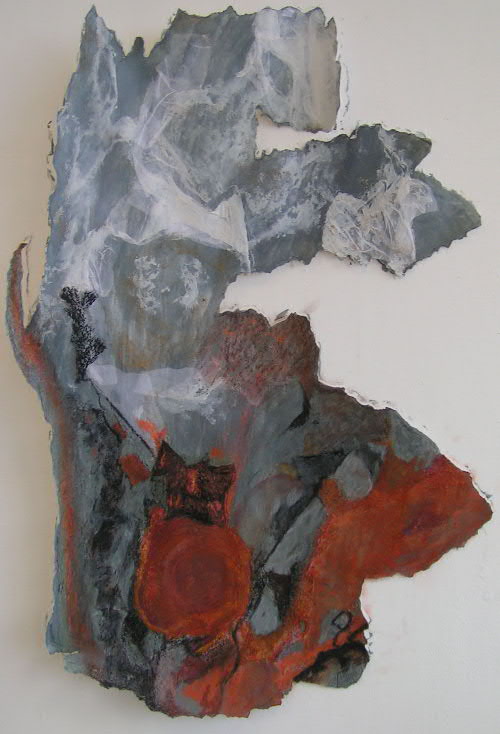
This one has some moulding paste beneath the pastel & pencil to give some texture, and some charcoal broken into the paper & dye dry-brushed over oil pastel, soft pastel & pencil.
Later on, I'll post about my trip to Ally Pally - more stash enhancement & some inspiration.

Wednesday, October 11, 2006

Just in case you didn't think knitting was obsessive

The Last Knit

fabulous Finnish animation.

Monday, October 09, 2006

I am dead. With this sock (& it's partner) I have been killed by a deadly combination of VonJela & Amanda.

Good fitting socks, seriously bright stripes, but I quite like the combination for a day when I'm not feeling subtle!

So, no more Rib of Doom for me, but there's still a fair amount of ribbing going on in my knitting bag!

This is how the commissioned waistcoat is looking so far:

I think the Mackenzie tweed has a feel to it of being "hardwearing" ! The silk in it is certainly on the rough side - not overly worked, one might say (i.e. there's rough tufty slubs of it in the yarn).

It does look suitably tweedy, and it'll certainly be a warm layer that won't wear out in a hurry!

The pattern however, is not for the knitter who is sewing-phobic. The pocket bands, armhole bands & front buttonhole/button band are all knitted (more 1x1 ribbing!) separately & then sewn on. "slightly stretched" sewing-on of bands is not my favourite pastime, but it'll finish the waistcoat off nicely - although I am trying to come up with devious plans of knitting on the bands , but I can't quite see how that'll quite work with vertical ribbing... maybe picking up and knitting the end stitch with the edge stitch? (kind-of like how an applied I-cord edging would be knitted on?) Still, I'm not entirely convinced, might just have to put up with the sewing!

I put the ribbing aside for an evening last night & made these for a friend who's just had a baby girl:

The sole is made from sheepskin so they're all fluffy inside!

The most dificult part was trying to make holes in the sheepskin - if I make many more of these I'll have to invest in a leather punch as my standard hole punch just couldn't cope! Other than that they were easy to make - all done in the round & with no sewing!

I hope they'll keep Emmeline's feet all snuggly & toasty warm over the winter.

Right, back to the ribbing & I need to study the Knitting & Stitching Show catalogue a bit more closely & plan my "must-see" stands for the weekend.

Friday, October 06, 2006

The rusty object continues

wednesdays efforts resulted in this:

A large piece of paper with torn edges, with a wash of grey/green acrylic applied. Then tissue paper & sand/pva glue mix to add some texture.

I did actually begin to add some colour and more texture on wednesday, but um, the whole class found that perhaps a bit too much texture had been added!

We were advised to bring in some wire wool for thursday!


Thursday was spent doing actual mark-making to build the surface & represent the rust & texture rather than just using paint/pastel/pigment/pencil.


this is at the end of thursday:

You can still see the moulding paste and tissue etc. at the top of the sheet, but the bottom looks a bit more like rust & degraded plastic!


Here's some detail:

There's layers & layers of oil pastel, soft pastel and pencil over the paint, trying to re-create the surface texture.

I am getting there, but it's certainly going to need a lot more work.

I also has a tutorial on wednesday - we talked a bit about the course & how I've found it with having had no art background (I was a scientist/engineer) and it is weird. The language used is different, the ways to describe my work have had to be re-learnt & the context of materials and processes has been expanded.

I'm really looking forward to the next few months & using knitting in different ways - wait for the pictures - I've got ideas for knitting & silicone, resin & even fireworks!

Sunday, October 01, 2006

Back to College

It is good to be back, but to a different studio - on the 4th floor rather than the basement (& the lift's not working - wheeze - it'll make me fitter!). Lots more light & some stunning views across the countryside - I'll take photos of the view next week - to one side, St. Ives, round to another side, St. Agnes beacon & further around to the Basset monument on Carn Brea.

This week's work however is all about TEXTURE - how to show texture on a flat surface, demonstrate it & really build effects.

first some samples - in monochrome black & white using pencil, pastel, paint, sand, wax, tissue, moulding paste, glue, scratching, rubbing, splattering ... marking paper & marking into other marks - layering one medium over another

This is the state of my desk:

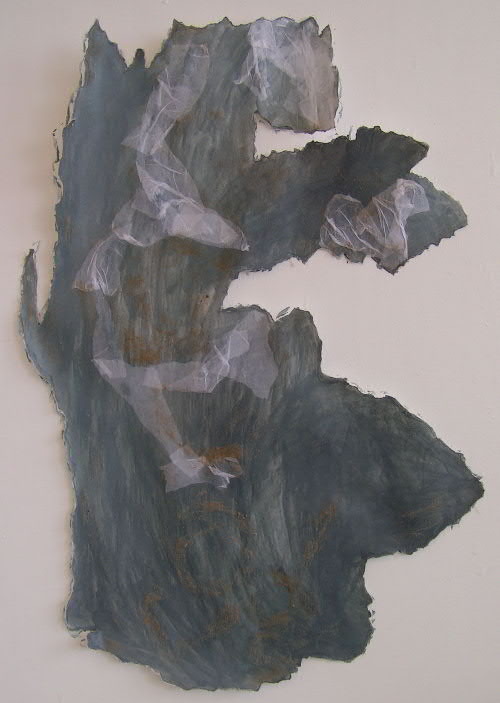
At the top is my sketchbook with marks on tissue stuck in - this exercise lead onto the other bits lying around on my desk, especially this:


yup, a rusty, decayed looking piece of junk. It's actually part of a road sign where the steel beneath the plastic coating has rusted out so badly that it burst through the plastic. I collected a piece of the plastic, the inside is most interesting. Bits of green algae, rust spots & staining - loads of texture & colour.

So what have I got to do with this?

1. take a piece of bread and butter paper (bigger than A1 size) and tear out the outline of my decayed "object" to fit the paper.

2. using paint, tissue, sand, wax, pastel, pencil...modrock, whatever! - recreate the surface texture on the piece of paper.

Not scary at all then!


Here's some "practice" bits (c'wise from left)

modrock stuck to paper and painted with soft pastel, Koh-i-noor dyes

modrock stuck to paper and painted with soft pastel, Koh-i-noor dyes & oil pastel

sand stuck to paper with wax

I really like the way that the soft pastel blends into the modrock plaster with water & becomes quite a subtle layer of colour that can be built upon. The wax and sand is great, but will probably need to be used towards the end & in moderation.

Sock Wars...

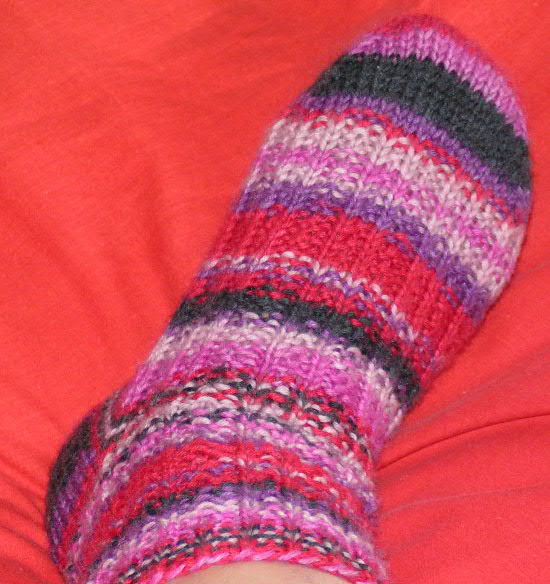
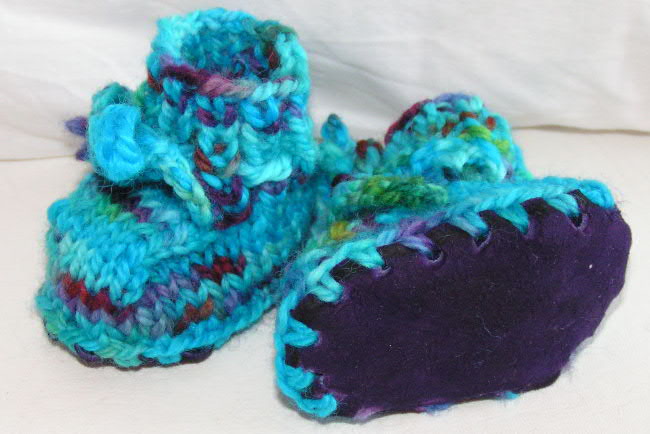
These were posted to the USA on thursday afternoon, so I'm still "alive" so far!

Knitted with a stashed ball-&-a-bit of Rowan Felted Tweed - yummy stuff but not so good for the "Rib of Doom" - it's a bit too textured really, but these are snuggly socks with an alpaca content and machine washable too :)

I hope they fit my "target" properly. I think that with most of my ribbing, they'll look better after a wash & a "blocking" (i.e. wearing).